Medical System
Overview
The medical system is available to all LHS (incl. HEMS/HART) and FRB/FRA. This is our diagnostic tool when checking, assessing and treating a patient.
Individual usage of drugs and treatments are covered in the LHS entry training and further development packages. The aim of this guide is the system itself so you have a more in depth understanding on how to use it. Individual treatments will not be offered in this guide. You must undertake medical training separately.
| Keybind | What it does |
|---|---|
| Y | Opens the self-diagnostic dashboard |
| H | Opens the medical menu for the nearest player |
| X | Cancels the current interaction (must be off the menu) |
| K | Forces player respawn (after 15mins) |
Diagnostic Menu Explained

You can press Y to open the self-diagnostic menu. Upon opening you will see the main interface above. Each button on this menu has an individual function which will be explained below.

On the top right of the menu you will see this image above, press this to open the nearby player menu. A list of nearby players (as well as how far away they are) will be displayed. You can then select a player from this list. (see below image)

Assessing injuries
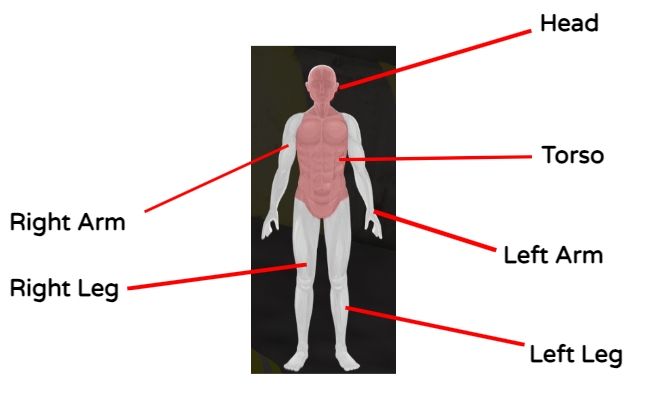
Upon selecting a player (whether via H key or player list), you will see in the center panel there will be a diagram of the body. Each limb is can be selected to view injuries relative to that limb, as well as any patient indications such as pain or blood loss.
An injury is indicated on the limb when the limb is red. The darker the colour, the more severe that injury. Below is a table showing the key indications you need to remember.
| Indicator | What it means |
|---|---|
| Light Red Colour | Minor injury to that area of the limb. |
| Dark Red Colour | Heavy injury to that area of the limb. |
| Purple Colour | Requires stitching from the HEMS Team. |
| White | No treatment required for that area. |
Understanding what each limb means

Each limb will have different injuries. As you can see on the above image, there's a red colour on the torso and head, which is indicating these areas have injuries.
Upon clicking that section, you will be presented with a series of injuries and any active effects on the right hand side. (shown below).

Medical Menu Options
Not all medical menu options will be available for each limb. For example, IV infusions will not show for the torso but resuscitation would. Each menu option is explained below (below image)

Some menu options may not be available on all limbs
Once you have selected the said patient, we can then begin assessing. When a patient is injured you will see a specific area of the body come up red. The darker the shade of red it is, the more injured they are in that area.
There's a few key things to note when interacting with the menu and assessing injuries!
- The center console will show a figure. This figure will have areas that will light up red if an injury is present. The darker the colour, the more sever the injury.
- It's important you select the limb that the injury is present in so you can begin your treatment plan.
- Upon selecting a limb, you will see a list of injuries on the right hand side console. This will list injuries in red, active pain in yellow and blood loss in red.
- On the top left hand side, you will see a list of menu options. Every menu will not be available for each limb. For example, the torso will not allow you to use the IV meds menu. Selecting different limbs unlock different menu options.
Blood Classes
The system allows us to assess the severity of blood loss and this is categories into “classes” from 1 to 4. This allows clinicians on scene to effectively understand the severity of blood loss, which will factor into the overall treatment of the patient. Remember! 6 litres is the most a human body can have.
| Description | Amount Lost |
|---|---|
| No loss of blood | 0 litres |
| Lost some blood | 0.9 litres |
| Lost a lot of blood | 1.8 litres |
| Lost a large amount of blood | 2.4 litres |